Wednesday 27 April 2016

Final Aluminium Skin


Skin For Object

For the draft skin, the shrinker was used to create the shape however due to the narrow area as it neared the top of the shape the shrinker was unable to replicate this shape. The shape did not fit easily into the shrinker, as well as the shrinker causing the aluminium to split. Hence for this reason and aesthetic purposes, since the shrinker leaves marks, it was chosen that the areas that needed to be shrunk would be shrunk by hand.

Shrinking using the tree stump, the ripple like shape at the edge of the circle replicate the folds and tucks of the shrinker.
The middle part of the circle stretched using the sand bag and tear dropped shaped hammer. The process of shrinker the edge and stretching the inner part continued until it remotely resembles a dome shapee.


Using the wedge like wooden hammer in a downward stroking motion curves the aluminium around the mould and in using a wooden hammer prevents dents in the surface of the aluminium.


The edges of the shape brought in further using the semi-sphere mould and slowly curving the aluminium around it.


Once the bottom dome like shape closely fits the skin of the object the upper 'neck' part of the shape if formed around a thinner tear drop like steel mould. Start by pulling the aluminium in to create the neck of the object then gradually create the reverse curve by hitting the aluminium at an angle against the mould.

Refined the reverse curve of the neck by using a arched thin mould.

Once the aluminium skin fits the object as close as possible, the surface of the aluminium is polished using a steel hammer, by gentle tapping the shaped against a steel surface. 

Practice Making A Dome

Once the edges are shrunk using the shrinker, the inner part of the circle hammered on a sand bag to stretch it.


The aluminium once approximately resembling a dome shape, is placed over the steel semi-sphere mould and refined to further fit the shape.


Sunday 17 April 2016

Laser Cut Object


123D Make


Tried various laser cutting methods on 123D Make. Radical slices, curve and interlocked slices provided a waffling option, whilst stacked slices was the layering of material.


Stacked Slices: Stacked slices did not give a nice curved surface for the metal to be formed over.

Radical Slices: Radical slices had issues with the waffling and joining of the slices, the elements highlighted in blue not joining to anything. Increasing the number of the 1st axis or radical count did not fix this issue, as it caused many more parts to be not connected to other pieces.

Curve: Curve was similar to interlocked slices however the slots created were at an angle, and could have proved difficult to join together once it was cut out.

Interlocked Slices: Finally interlocked slices was chosen as it proved to create a nice curved surface for the aluminium skin to be formed over as well as being the most practical waffling solution.


Plywood was chosen to be used in making this object, as it a relatively strong material, however the plywood will probably not be strong enough for the aluminium skin to be hammered over.

Also on 123D Make the scale of the object was doubled, since the curving around the thinner parts of the object could possibly become an issue.


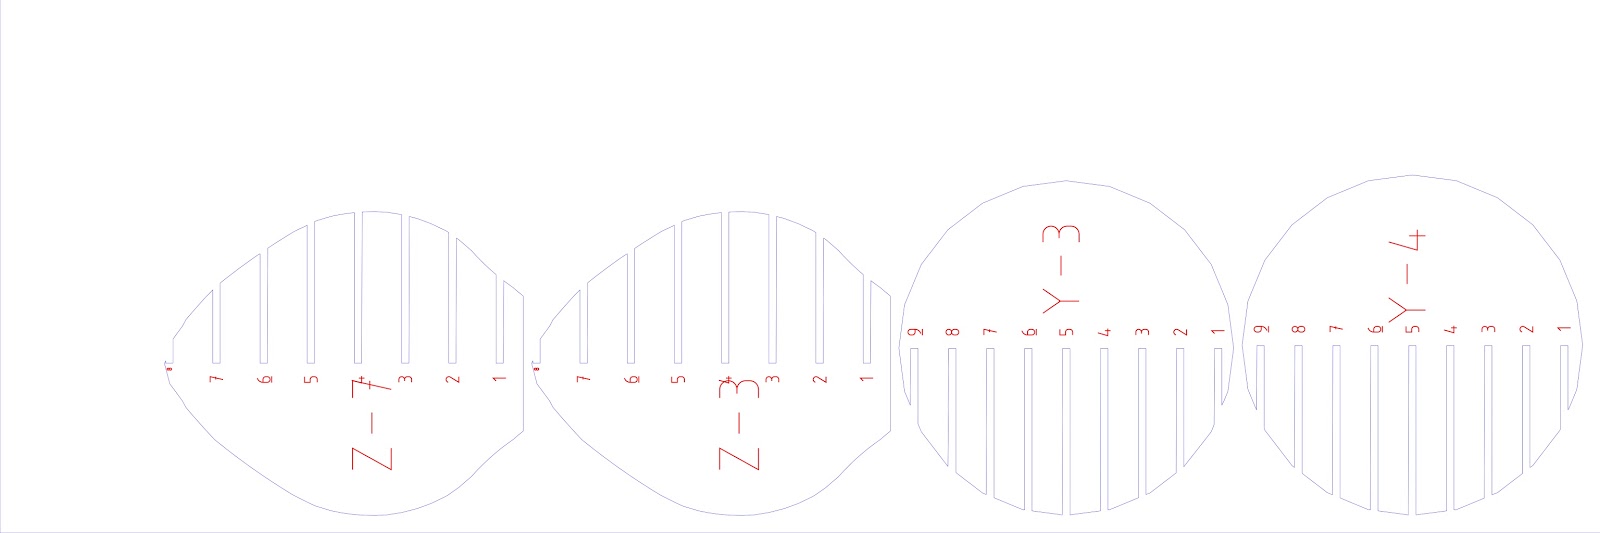
File for Laser Cutting


123D Make plans exported into PDF

Once the plans where exported as a PDF, they were opened in Adobe Illustrator and the colours of the line changed to be suitable for the laser cutter. Red lines (R:255 G:0 B:0) for cuts at stroke 0.001mm (0.025points).

The file had to be changed to be 600x200mm instead of the conventional 600x300mm layout because the workshop had no plywood sheets left in that size. The same dimensions for the object pieces were retained, however it had to be exported in a portrait format and rotated in Illustrator.

The file was then transferred to the lab computer and was printed to the laser cut machine.

123D Catch


Took photos of my object and imported them into 123D Catch. Once the 3D object was created, the lasso toll was used to select the background and delete it, leaving only the object.

To improve the quality of the capture, it was suggested by various sources to lay newspaper down as the background, so that the program could easily form the 3D object as the text gave points of reference.

Friday 15 April 2016

Object Choice


My choice of object relating to Architecture was my sticky notes that sit on my table. Not only do I commonly use this to jolt down ideas and notes in my studies, this object fundamentally shows the layering of a 2D object to become a 3D form.

Architecture is a practice consistently transforming two dimensional elements into three dimensional forms, buildings starting off a sketches, plans, sections and elevations that translate then into models whether it be physical or virtual models, to potentially becoming real life buildings. Hence showing that even the greatest of architecture begins on paper.